DeveloperWeek 2026

DeveloperWeek 2026

This was my second time as a speaker at DeveloperWeek. This time it was located in San Jose, California. It is still a fairly well attended event, but it felt a little smaller this time than when I attended three years ago. The focus is a bit different than the usual conferences I attend and speak at. I don’t think I have had to explain what Eclipse Foundation is and does as often at any conference before.

I presented The Past, Present, and Future of Enterprise Java on the first day of the conference. As the main conference started on Thursday, this was practically a day-zero event with separate passes and potentially a different audience.

The talks on the first day are called workshops, but are really regular 50-minutes long technical sessions. For the rest of the conference, the session length is 25 minutes, so in that regard speaking on this day is better. It is really hard to give a good technical talk in 25 minutes. The downside is that there is a little fewer attendees on this day than on the first conference day. But still a decent outcome.

My talk went well, all demos worked, and I got some good questions and chats afterwards.

On Friday, I was part of a panel regarding “Low cost, big impact marketing”. The panel was moderated by Stephen Chin from Neo4j. All the panelists had roles within developer relations, or developer marketing if you like.

We talked about the importance of being present at conferences, where the developers are, the importance of the hallway track.

Another topic we discussed where how to nurture and scale the community around the product/project/technology we are advocating for.

An interesting touch by Steve at the end was to do the Q&A on the floor among the attendees and not on the stage. That way everyone can ask their question to the panelist they wanted rather than having to listen to all panelists responding to someone else’s question.

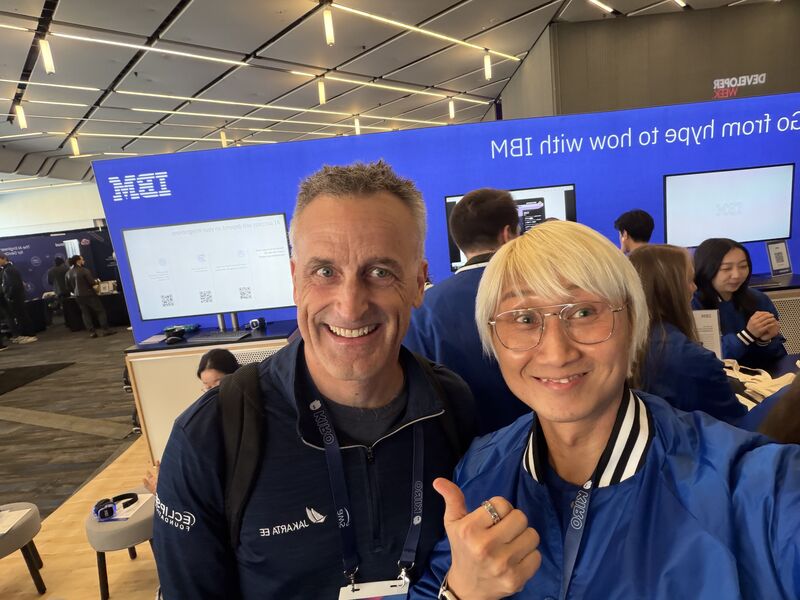
The best part of attending a conference is meeting and catching up with old and new friends. The hallway track…

Ivar Grimstad


Python CGI Programming Tutorial: Learn Server-Side Python Step by Step


Python is a popular programming language used for many purposes, including web development. One important topic in web development is CGI, which stands for Common Gateway Interface. CGI helps a web server communicate with programs written in languages like Python. With the help of CGI, you can create dynamic web pages that respond to user input.

The Python CGI Programming Tutorial is designed to help beginners understand how Python works with web servers. It explains how a server runs a Python script and sends the output back to the user’s browser. This process makes websites interactive and useful. For example, when a user fills out a form on a website, CGI allows the server to process that data and return a result.

In this tutorial, you will learn about setting up a CGI environment, handling form data, working with environment variables, and understanding how the server and browser communicate. Everything is explained in simple language so that students and beginners can easily follow along.

The tutorial also covers important concepts like HTTP headers and how web applications handle requests and responses. By understanding these basics, you can build a strong foundation in server-side programming using Python.

If you want to learn how Python can be used to create interactive websites and understand how servers process requests, start learning with the complete Python CGI Programming Tutorial.

Operational Excellence Begins With Architecture Awareness

When you join a new project, whether you’re a junior engineer or a senior, the first thing you should focus on is not Kubernetes, not Docker, not Terraform.

Start with the application.
Understand the system before the tools.

How many services exist?
What are the core components?
Which component communicates with which?
Where does a request begin, and where does it finally end?

And most importantly, draw it.


As DevOps engineers, our job isn’t to memorize every tool in the ecosystem. Our real responsibility is to understand the application deeply and ensure it keeps running reliably.

Once you truly understand the system, connections become clear.
You see how pub/sub works through messaging, how queues process workloads, how the database holds state, how event-driven functions react, and how networking, caching, and background workers all cooperate to make one application operate as a whole.

Here’s the important part:

If background processing suddenly stops, you might never think of the queue unless you understand the request flow. And even if you suspect it, you can only fix it if you know how it was configured and what recently changed.

Tools rarely fail alone. Systems do.

That’s why watching tutorials isn’t enough. Always connect what you learn back to the real application.
When you join a team, first understand the architecture:

  • What is legacy?
  • What is modernized?
  • What depends on what?

Only then should you dive into the tools.

*Challenge *
Create a complete architecture diagram of your application. Include every service or layer. Trace the full journey. From user request to database to async processing and back, focusing on components, not technologies.

Because without understanding the application, you can’t reliably keep it running. And in the end, that’s what truly matters.

Docker vs Kubernetes – Which One Should You Actually Use?

“Just use Docker, it’ll be fine.”
Famous last words before a 3 AM production outage.

If you have spent any time in backend or DevOps engineering, you have heard both names thrown around — sometimes interchangeably, sometimes in heated arguments, occasionally in tears at midnight.

Here is the truth that will save you hours of confusion:

Docker and Kubernetes are not competitors. They do not even do the same job.

Understanding the difference is one of the most practical architectural decisions you will make as an engineer. This article gives you a clear mental model, real code examples, and an honest framework for deciding which one belongs in your stack right now.

Prateek Agrawal MIT Manipal Docker Kubernetes Senior Software Engineer

The One Analogy You Will Never Forget

Think of your application as a train.

Docker is the train itself. It packages your app and everything it needs — runtime, libraries, dependencies, config — into a single self-contained unit called a container. Run it on your laptop, in a CI pipeline, on a cloud VM. It behaves identically everywhere.

Kubernetes is the entire railway network. The tracks, signals, dispatch center, scheduling system, and control room managing hundreds of trains simultaneously. It does not care what is inside the trains. It cares about where they go, how many run at once, and what happens when one breaks down.

One is a packaging tool. The other is an orchestration platform.

This single distinction eliminates 90% of the confusion around these two tools.

Docker – The Simple Path

Docker launched in 2013 and fundamentally changed how software gets shipped. Before containers, deploying an app meant praying your production environment matched your development environment. It usually did not.

Docker solved this with one elegant idea: ship the environment alongside the code.

Core Docker Concepts

Dockerfile — A recipe for building your container image:

FROM node:18-alpine

WORKDIR /app

COPY package*.json ./
RUN npm install

COPY . .

EXPOSE 3000
CMD ["node", "server.js"]

Docker Image — A portable, immutable snapshot of your app and its environment.

Docker Container — A running instance of that image. Lightweight, isolated, and disposable.

Docker Compose — Defines and runs multi-container applications locally. Your app, a Postgres database, and a Redis cache — all spun up with one command:

# docker-compose.yml
version: '3.8'

services:
  app:
    build: .
    ports:
      - "3000:3000"
    environment:
      DATABASE_URL: postgres://postgres:secret@db:5432/myapp
    depends_on:
      - db

  db:
    image: postgres:15
    environment:
      POSTGRES_PASSWORD: secret
    volumes:
      - postgres_data:/var/lib/postgresql/data

  cache:
    image: redis:7-alpine

volumes:
  postgres_data:

Run docker compose up and you have a full local stack running in seconds. Zero environment mismatch. Zero “works on my machine.”

When Docker Alone is the Right Call

  • Building and testing locally
  • Deploying to a single server
  • Small team, simple pipeline
  • Early-stage product, pre-scale
  • Predictable, manageable traffic

Docker is not a beginner tool that you graduate from. Plenty of serious production systems run beautifully on a single Docker host behind a reverse proxy like Caddy or Nginx. Do not add complexity you have not earned yet.

Kubernetes – The Orchestrated Journey

Kubernetes was open-sourced by Google in 2014, built on top of lessons from their internal system called Borg — a platform that had been running containers at planetary scale for over a decade.

The name comes from the Greek word for “helmsman.” Kubernetes does not build your containers. It steers them.

The Problem Kubernetes Was Built to Solve
Imagine you have 50 Docker containers running your microservices across 10 servers. Now answer these questions:

  • A container crashes at 3 AM. Who restarts it?
  • Traffic spikes every day at 2 PM. Who spins up extra instances?
  • You need to deploy a new version. How do you do it without downtime?
  • Two containers on different servers need to talk to each other. How do they find each other?
  • An entire server goes down. What happens to the containers running on it?

With standalone Docker, the answer to every single one of those questions is: you do it. Manually.
Kubernetes automates all of it.

Core Kubernetes Concepts

Pod — The smallest deployable unit in K8s. Usually wraps a single container.

Deployment — Declares the desired state: how many replicas you want, which image to run, and how to roll out updates:

apiVersion: apps/v1
kind: Deployment
metadata:
  name: my-app
  labels:
    app: my-app
spec:
  replicas: 3
  selector:
    matchLabels:
      app: my-app
  template:
    metadata:
      labels:
        app: my-app
    spec:
      containers:
      - name: my-app
        image: myrepo/my-app:v2.1
        ports:
        - containerPort: 3000
        resources:
          requests:
            memory: "128Mi"
            cpu: "250m"
          limits:
            memory: "256Mi"
            cpu: "500m"

Service — A stable network endpoint that routes traffic to healthy Pods, even as individual Pods come and go:

apiVersion: v1
kind: Service
metadata:
  name: my-app-service
spec:
  selector:
    app: my-app
  ports:
  - port: 80
    targetPort: 3000
  type: ClusterIP

Ingress — Manages external HTTP/HTTPS traffic and routing rules into your cluster.

HorizontalPodAutoscaler (HPA) — Automatically scales your Deployment based on CPU, memory, or custom metrics:

apiVersion: autoscaling/v2
kind: HorizontalPodAutoscaler
metadata:
  name: my-app-hpa
spec:
  scaleTargetRef:
    apiVersion: apps/v1
    kind: Deployment
    name: my-app
  minReplicas: 2
  maxReplicas: 10
  metrics:
  - type: Resource
    resource:
      name: cpu
      target:
        type: Utilization
        averageUtilization: 70

ConfigMap and Secret — Store configuration and credentials separately
from your container images.

*Namespace *— Logical isolation inside a cluster. Think of it as folders for your workloads.

What Kubernetes Handles Automatically

  • Self-healing — Crashes are detected and containers restarted without human intervention
  • Auto-scaling — Scale up under load, scale down to reduce cost
  • Rolling updates — Deploy new versions with zero downtime
  • Service discovery — Containers find each other by name, not IP address
  • Load balancing — Traffic is distributed evenly across healthy instances
  • Multi-node scheduling — Workloads are intelligently placed across your server fleet
  • Secret management — Centralized, encrypted credentials and configuration

Side-by-Side Comparison

Feature Docker (standalone) Kubernetes
Primary role Containerization Orchestration
Complexity Low High
Learning curve Gentle Steep
Best for Single host, local dev Multi-node, production scale
Auto-scaling Manual Built-in via HPA
Self-healing ❌ No ✅ Yes
Rolling deploys Manual Built-in
Setup time Minutes Hours to days
Multi-service locally Docker Compose Helm / manifests
Managed cloud option Docker Desktop EKS, GKE, AKS
Operational overhead Very low Significant

Do You Actually Need Kubernetes?

This is the most important question in this article — and most engineers jump to the wrong answer.

Stay with Docker if:

  • Your app runs on 1 to 3 servers
  • Traffic is stable and predictable
  • Your team is fewer than 5 engineers
  • You are pre-product-market fit
  • Speed of iteration matters more than operational sophistication right now

Move to Kubernetes if:

  • You are running 10 or more microservices
  • You need automatic failover and zero-downtime deployments
  • Traffic patterns require elastic scaling
  • You have dedicated DevOps or platform engineering capacity
  • Manual container management has already become unsustainable

The Part Most Articles Skip
Kubernetes is powerful. It is also expensive in ways that are easy to underestimate:

Operational overhead — The cluster itself needs maintenance, upgrades, and monitoring. This is a non-trivial ongoing cost.

Debugging complexity — Distributed systems fail in distributed ways. When something goes wrong in K8s, the blast radius of confusion is much larger.

Learning investment — YAML manifests, networking models, RBAC, storage classes, admission controllers — K8s has a genuinely deep surface area.

Real dollar cost — A highly available Kubernetes cluster with proper redundancy is not cheap, especially on managed services.

Many successful, profitable software products run without Kubernetes. Premature orchestration is a form of over-engineering, and over-engineering has killed more startups than under-engineering ever has.

“Complexity is debt. Make sure it is paying dividends.”

How They Work Together in Practice

In most real-world production setups, Docker and Kubernetes are not competing choices — they work together as layers in the same pipeline:

Developer writes code
        |
        v
Docker builds the image    <-- Dockerfile
        |
        v
Image pushed to a registry <-- Docker Hub / ECR / GCR / GHCR
        |
        v
Kubernetes pulls the image <-- Deployment manifest
        |
        v
K8s runs, scales, heals, and routes traffic to your containers

Docker creates the artifact. Kubernetes operates it. They complement each other at different layers of the stack.

Getting Started Today

New to Docker?

# Pull and run an existing image
docker run -p 8080:80 nginx

# Build your own image
docker build -t my-app .

# Run your container
docker run -p 3000:3000 my-app

# Run with Docker Compose
docker compose up --build

Ready to Try Kubernetes Locally?
Two great options for running K8s on your machine:

*minikube *— Single-node local cluster, great for learning
*kind *(Kubernetes IN Docker) — Faster, runs K8s inside Docker containers

# Install minikube (macOS example)
brew install minikube

# Start a local cluster
minikube start

# Deploy something
kubectl apply -f deployment.yaml

# Check what is running
kubectl get pods
kubectl get services

Ready for Production?
Skip managing your own control plane and use a managed service:

  • Google GKE — Generally considered the most polished managed K8s experience
  • Amazon EKS — Best if your stack is already AWS-native
  • Azure AKS — Best if your stack is already Azure-native

Recommended Resources

Docker Official Documentation
Kubernetes Official Documentation
Kubernetes the Hard Way by Kelsey Hightower

The Broader Lesson

The Docker vs Kubernetes question is a proxy for a deeper engineering principle:

Let complexity earn its place.

Every powerful tool carries a cost. Kubernetes earns that cost when your scale makes its benefits outweigh its overhead. Before you reach that point, it is a liability dressed up as sophistication.

The best engineers do not chase the most complex solution available. They pick the right tool for right now, with a clear-eyed view of what they will need next.

Start simple. Scale deliberately. Earn complexity.

Where are you on this journey — Docker, Kubernetes, or still figuring out which track is yours?
Drop a comment below, I read every one.

bservability accessible to teams of all sizes.

💬 If you found this guide helpful, feel free to share or leave a comment!

🔗 Connect with me online:
Linkedin https://www.linkedin.com/in/prateek-bka/

👨‍💻 Prateek Agrawal
A21.AI Inc. | Ex – NTWIST Inc. | Ex – Innodata Inc.

🚀 Full Stack Developer (MERN, Next.js, TS, DevOps) | Build scalable apps, optimize APIs & automate CI/CD with Docker & Kubernetes 💻

prateek-bka (Prateek Agrawal) · GitHub

🚀 Full Stack Developer (MERN, Next.js, TS, DevOps) | Build scalable apps, optimize APIs & automate CI/CD with Docker & Kubernetes 💻 – prateek-bka

favicon
github.com

OpenClaw on Mac Mini: Secure 24/7 Setup Guide for Production Use

This is a step-by-step guide to run OpenClaw on a Mac mini, intended for 24/7 uptime with a security-first baseline.

**Side note: **If you want this set up for you, message me. I’ll install it and tailor the agent to your goals.

Phase 1: macOS prep (uptime + baseline hardening)
1) Stop the machine from sleeping

sudo pmset -a sleep 0 disksleep 0 displaysleep 0
sudo pmset -a hibernatemode 0 powernap 0
sudo pmset -a standby 0 autopoweroff 0
sudo pmset -a autorestart 1

Verify:

pmset -g | grep sleep

Expected: sleep-related values are 0.

2) Keep the system awake across reboots (LaunchAgent + caffeinate)


cat > ~/Library/LaunchAgents/com.openclaw.caffeinate.plist << 'EOF'
<?xml version="1.0" encoding="UTF-8"?>
<!DOCTYPE plist PUBLIC "-//Apple//DTD PLIST 1.0//EN" "http://www.apple.com/DTDs/PropertyList-1.0.dtd">
<plist version="1.0">
<dict>
    <key>Label</key>
    <string>com.openclaw.caffeinate</string>
    <key>ProgramArguments</key>
    <array>
        <string>/usr/bin/caffeinate</string>
        <string>-s</string>
    </array>
    <key>RunAtLoad</key>
    <true/>
    <key>KeepAlive</key>
    <true/>
</dict>
</plist>
EOF

launchctl load ~/Library/LaunchAgents/com.openclaw.caffeinate.plist

Verify:

pgrep caffeinate

Expected: returns a PID.

3) Enable auto-login for the agent user

System Settings → Users & Groups → Login Options → Automatic login: [agent user]

4) Turn on firewall + stealth mode
sudo /usr/libexec/ApplicationFirewall/socketfilterfw --setglobalstate on
sudo /usr/libexec/ApplicationFirewall/socketfilterfw --setstealthmode on

5) Disable services you don’t need

sudo mdutil -a -i off
defaults write com.apple.NetworkBrowser DisableAirDrop -bool YES

6) Lock down home directory permissions

chmod 700 ~/

7) Enable FileVault (full disk encryption)

System Settings → Privacy & Security → FileVault → Turn On

8) Optional: enable Remote Login (SSH)

System Settings → General → Sharing → Remote Login → ON Restriction: agent user only.
Phase 2: Install Tailscale

brew install tailscale
tailscale up

Follow the auth URL to join your tailnet.

Verify:

tailscale status

Note: If you already have the Mac App Store version installed, the Homebrew CLI can conflict. The App Store build also doesn’t support Tailscale SSH. Use the Mac app for GUI management and the brew CLI for tailscale serve only.

Phase 3: Install prerequisites
Homebrew (if needed)

/bin/bash -c "$(curl -fsSL https://raw.githubusercontent.com/Homebrew/install/HEAD/install.sh)"

Node 22+

brew install node@22

Git

brew install git

Verify Node:

node -v

Expected: 22+
Create a Telegram bot (required for onboarding)

Message @botfather on Telegram
Send /newbot, choose name + username
Copy the bot token (used during onboarding)

Phase 4: Install OpenClaw and run onboarding

Install:

npm install -g openclaw@latest

Onboard:

openclaw onboard --install-daemon

During the wizard you’ll handle gateway setup, model/auth, channels (Telegram + bot token), skills, and daemon install.

Known bug (v2026.2.12+ / Issue #16134): the wizard can skip the Model/Auth step and jump ahead without collecting an API key. If that happens, the agent will be unresponsive. The fix is in Phase 5.

Verify:

openclaw --version
openclaw health

Pair Telegram:

Message your bot on Telegram, get the pairing code
Approve:

openclaw pairing list --channel Telegram
openclaw pairing approve Telegram <CODE>

Verify again:

openclaw health

Expected: Telegram: ok (@yourbotname)

Phase 5: Configure API key + model setup
5.1 Remove stale env var overrides

A shell-level ANTHROPIC_API_KEY can override OpenClaw config and cause silent auth failures if it’s wrong.

Check:

echo $ANTHROPIC_API_KEY

If it returns something, find where it’s set:

grep -rn ANTHROPIC_API_KEY ~/.zshrc ~/.zprofile ~/.bash_profile ~/.zshenv 2>/dev/null

Remove the export line, then:

source ~/.zshrc
unset ANTHROPIC_API_KEY

5.2 Confirm your key works with a direct API call

Replace YOUR_KEY with your key from console.anthropic.com:

curl https://api.anthropic.com/v1/messages
-H "x-api-key: YOUR_KEY"
-H "content-type: application/json"
-H "anthropic-version: 2023-06-01"
-d '{"model":"claude-sonnet-4-20250514","max_tokens":50,"messages":[{"role":"user","content":"hi"}]}'

Expected: a JSON reply with Claude output. Errors usually mean the key is invalid.

5.3 Add env + models to openclaw.json

Edit:
nano ~/.openclaw/openclaw.json

Add at top-level:

"env": {
"ANTHROPIC_API_KEY": "YOUR_ACTUAL_KEY_HERE"
},

Inside agents.defaults, set model strategy:

"model": {
"primary": "anthropic/claude-sonnet-4-6",
"fallbacks": ["anthropic/claude-opus-4-6"]
},
"heartbeat": {
"every": "30m",
"model": "anthropic/claude-haiku-4-5",
"activeHours": { "start": "08:00", "end": "23:00" }
},

Meaning:

Sonnet for normal work
Haiku for heartbeat pings
Opus as fallback

Important: avoid the setup-token auth flow (openclaw models auth setup-token). It uses OAuth bearer tokens that can get stuck in persistent 401 loops. Prefer direct API key via the env block.

If onboarding created an auth.profiles block with “mode”: “token”, it can override your env key. If you see 401 errors, remove auth.profiles and delete:

rm ~/.openclaw/agents/main/agent/auth-profiles.json

5.4 Restart and test end-to-end

openclaw gateway restart
openclaw tui

Type hello. If you get (no output) or 401s, revisit 5.1 to 5.3.
Phase 6: Expose the dashboard safely with Tailscale Serve

tailscale serve --bg http://127.0.0.1:18789

Use http:// (plain loopback). Using https+insecure:// often yields 502 errors.

Access from tailnet: https://[mac-mini-hostname].tail[xxxxx].ts.net

Verify from another device:

curl -k https://[mac-mini-hostname].tail[xxxxx].ts.net

Security note: Use Serve, not Funnel. Serve stays private to your tailnet.

Phase 7: Security hardening

Run audits:

openclaw security audit
openclaw security audit --deep
openclaw security audit --fix

Lock down permissions:

chmod 700 ~/.openclaw
chmod 600 ~/.openclaw/openclaw.json
find ~/.openclaw/credentials -type f -exec chmod 600 {} ;
find ~/.openclaw/agents -name "auth-profiles.json" -exec chmod 600 {} ;
find ~/.openclaw/agents -name "sessions.json" -exec chmod 600 {} ; 

Verify gateway binds to loopback:

grep '"bind"' ~/.openclaw/openclaw.json
Expected: loopback

Verify token auth mode:

grep -A 3 '"auth"' ~/.openclaw/openclaw.json

Expected: “mode”: “token”

Verify DM pairing policy:

grep '"dmPolicy"' ~/.openclaw/openclaw.json

Expected: pairing

Verify no insecure flags:

grep "allowInsecureAuth" ~/.openclaw/openclaw.json
grep "dangerouslyDisableDeviceAuth" ~/.openclaw/openclaw.json

Expected: no output

Run doctor:

openclaw doctor --fix

Note: gateway.discovery.mode is not a valid config key in v2026.2.13. Don’t add it.
Phase 8: Define the agent’s identity (this is what makes it useful)

List workspace files:
ls ~/.openclaw/workspace/

Use your LLM to generate these files:

IDENTITY.md
SOUL.md
USER.md
AGENTS.md
HEARTBEAT.md

Then paste them into:
nano ~/.openclaw/workspace/IDENTITY.md
nano ~/.openclaw/workspace/SOUL.md
nano ~/.openclaw/workspace/USER.md
nano ~/.openclaw/workspace/AGENTS.md
nano ~/.openclaw/workspace/HEARTBEAT.md

Warning: an empty HEARTBEAT.md can cause heartbeat to silently skip. It needs real content.

Test understanding (via Telegram): Ask it to explain autonomy zones, what it can do without permission, and what it must never do.

Phase 9: Cron jobs (optional)

Only add scheduled tasks if needed. Use –session isolated to avoid heartbeat prompt hijacking (bug #3589).


openclaw cron add 
  --name "job-name" 
  --cron "0 7 * * 1-5" 
  --tz "Europe/Vienna" 
  --session isolated 
  --message "Clear, specific instruction here." 
  --model "anthropic/claude-sonnet-4-5" 
  --deliver 
  --channel telegram 
  --best-effort 

Verify:
openclaw cron list

Phase 10: Final verification checklist

macOS:
pmset -g | grep sleep
pgrep caffeinate
tailscale status

OpenClaw:

openclaw --version
openclaw health
openclaw security audit
openclaw system heartbeat last
openclaw cron list

Security:
grep '"bind"' ~/.openclaw/openclaw.json
grep '"dmPolicy"' ~/.openclaw/openclaw.json

Tailscale:

tailscale serve status

Behavior test: Send a task on Telegram. You should see it start without extra permission prompts, report results, and log work to memory/YYYY-MM-DD.md.
Key commands

Gateway

openclaw gateway restart
openclaw gateway status
openclaw dashboard

Status

openclaw health
openclaw doctor --fix
openclaw system heartbeat last

Security

openclaw security audit --deep --fix

Cron

openclaw cron list
openclaw cron add --name "..." --cron "..." --tz "..." --session isolated --message "..."

Telegram pairing

openclaw pairing list --channel Telegram
openclaw pairing approve Telegram <CODE>

Models

openclaw models status
openclaw models list

Config

cat ~/.openclaw/openclaw.json

Tailscale

tailscale status
tailscale serve status
tailscale serve --bg http://127.0.0.1:18789

Now if you don’t want to deal with any of this, contact me. I’ll set it up and tailor the agent to your business goals so you don’t have to figure it out.

I built a GitHub star monitor in a single YAML file — zero dependencies, zero config

GitHub doesn’t notify you when someone stars your repo. Or unstars it. You either refresh your profile page like a maniac, or you just… never find out.

Tools like star-history.com let you look up trends, but you have to visit the site every time. GitHub Apps like Star Notifier automate it, but now a third-party service is handling your tokens. Self-hosted solutions like github-star-notifier need a server running somewhere.

I wanted something automatic that requires zero infrastructure. So I built it using nothing but GitHub Actions.

What it does

GitHub Star Checker monitors star counts across all your public repositories and notifies you when stars change — gains or losses.

  • Runs every hour by default (configurable from the GitHub UI)
  • Sends alerts via GitHub Issues or Gmail
  • Generates weekly and monthly reports
  • All logic lives in a single workflow file

No server, no database, no dependencies — just one YAML file and GitHub’s free compute.

How it works

GitHub Actions workflow dispatch UI showing schedule, notification channel, and report options

  1. A cron job triggers every hour on GitHub Actions
  2. Fetches star counts for all your public, non-fork repos via the GitHub API
  3. Compares with the previous snapshot stored in stars.json
  4. If anything changed → sends a notification
  5. Commits the updated data back to the repo

The workflow updates itself — including the schedule and notification settings — so you configure everything from the GitHub UI. No code editing needed.

Since it runs in its own forked repo, your existing repositories stay completely untouched.

What the notifications look like

GitHub Issue alert

GitHub Issue notification showing a new star gain on a repository

Email alert

Gmail inbox showing a GitHub star change alert email

Weekly report

GitHub Issue showing a weekly star summary report with total counts

Setup in 60 seconds

  1. Fork the repo
  2. Enable workflows in the Actions tab
  3. Add your Personal Access Token (repo + workflow scopes) as STAR_MONITOR_TOKEN in Settings > Secrets
  4. Run the workflow — done.

The first run records your current star counts. From the second run onward, you’ll get notified about any changes.

That’s it. No YAML to write, no config files to edit, no CLI to install.

Why not just use a GitHub App?

Fair question. Apps like Star Notifier are convenient — install and go. But:

  • They’re third-party services processing your GitHub data
  • You can’t customize the logic or notification format
  • If the service goes down or gets discontinued, you lose it

This project is entirely yours. It’s a fork in your account, running on GitHub’s own infrastructure. You can read every line of code, modify anything, and it’ll keep running as long as GitHub Actions exists.

Interesting technical bits

  • Self-modifying YAML: When you change settings via workflow_dispatch, the workflow uses sed to update its own cron schedule and env variables, then commits the change. Future runs pick up the new settings automatically.
  • Zero-conflict git strategy: The workflow stashes local changes, rebases on remote, then pops — handling concurrent scheduled runs gracefully.
  • 32-day history retention: Daily snapshots are stored in stars-history.json for weekly/monthly reports, with automatic pruning.

Limitations

Being honest about the trade-offs:

  • Not real-time: GitHub Actions cron can delay 5–30 minutes. This is periodic monitoring, not instant webhook-based alerts.
  • Notification channels: Currently supports GitHub Issues and Gmail. No Slack/Discord/Telegram yet (PRs welcome!).
  • Commit history: The workflow commits stars.json updates to the forked repo. This is by design (persistence without external storage), but your fork’s commit log will grow over time.
  • API usage: Each run makes one paginated API call. Even with 100+ repos, it stays well within GitHub’s rate limits.

Try it out

👉 github.com/WoojinAhn/github-star-checker

Fork it, set one secret, and forget about it. You’ll know when your stars move.

If you find it useful, a ⭐ would be appreciated — and yes, I’ll get notified about it 😄

Write Modern Go Code With Junie and Claude Code

Go developers can now confidently write modern Go code using the AI agents Junie and Claude Code. We at JetBrains have just released a new plugin with guidelines for AI agents that ensure they use the latest features and follow best Go practices compatible with your current version of Go, as specified in go.mod. You can find the relevant GitHub repository at go-modern-guidelines.

Why do you need it?

With two major releases every year, Go is one of the more frequently updated languages. Yet we’ve found that all AI agents – Junie and Claude Code included – tend to generate obsolete Go code.

The Go team also pointed to that problem in one of their articles: “During the frenzied adoption of LLM coding assistants, we became aware that such tools tended – unsurprisingly – to produce Go code in a style similar to the mass of Go code used during training, even when there were newer, better ways to express the same idea.”

As an example, here’s a sample code snippet of how an agent used a manual loop to find an element in the slice:

// HasAccess checks if the user's role has access to protected resources.
func HasAccess(role string) bool {
    for _, allowed := range allowedRoles {
       if role == allowed {
          return true
       }
    }
    return false
}

There are two main reasons why agents would favor obsolete architecture where cleaner and more idiomatic solutions are available:

  • Data cutoff: Even the most current AI models are trained on time-bound datasets that have a “cutoff” date (for example, for Claude Opus 4.6, that’s May 2025). They will not recognize or suggest features that were introduced after that point, such as those found in the Go 1.26 release.
  • Frequency bias: AI models are primarily trained on open-source codebases that may not be readily updated. It’s natural that such datasets will feature more “old” code than “new”, and since AI models favor alternatives that are more frequent, they will suggest obsolete code as a result.

Just like the Go team, we at GoLand, strive to keep the Go ecosystem modern and idiomatic. So to mitigate the effect of AI agents contributing to this issue, we’ve created a plugin with a set of guidelines for Junie and Claude Code, that helps them generate modern Go code. The plugin automatically recognizes the current version of your Go code (specified in go.mod) and instructs the agent to use corresponding features, such as new(val) instead of x := val; &x or errors.AsType[T](err) instead of errors.As(err, &target) (both introduced in Go 1.26), as well as stdlib additions available up to and including that version.

Here’s the same code sample from before with our guidelines applied, where the agent actually uses the modern slices.Contains() method introduced in Go 1.21.

var allowedRoles = []string{"admin", "moderator", "editor"}

// HasAccess checks if the user's role has access to protected resources.
func HasAccess(role string) bool {
	return slices.Contains(allowedRoles, role)
}

How to enable

In Junie

For Junie version 2xx.620.xx or higher, you don’t have to do anything – these guidelines will be applied right out of the box.

If you’re running an older version, go to SettingsPluginsInstalled, find Junie, and then click Update.

If, for some reason, you want to disable these settings, you can do so in SettingsToolsJunieProject SettingsGo. The Provide modern Go guidelines option is enabled by default, so untick the box.

Download GoLand

In Claude Code

To use these guidelines in Claude Code, run the following commands inside a Claude Code session to install it.

Add this repository as a marketplace:

/plugin marketplace add JetBrains/go-modern-guidelines

Install the plugin:

/plugin install modern-go-guidelines

To activate it, run the following command at the start of a session:

/use-modern-go

Claude Code will then detect the Go version from go.mod and instruct the agent to use modern features compatible with that version.

> /use-modern-go

This project is using Go 1.24, so I'll stick to modern Go best practices

and freely use language features up to and including this version.

If you'd prefer a different target version, just let me know.

After this, any Go code that the agent writes will follow the guidelines.

Happy coding!
The GoLand team

IntelliJ IDEA 2025.3.3 Is Out!

We’ve just released the next minor update for IntelliJ IDEA 2025.3 – v2025.3.3.

You can update to this version from inside the IDE, using the Toolbox App, or using snaps if you are a Ubuntu user. You can also download it from our website.

Here are the most notable updates:

  • MCP server output schema now correctly handles default properties in the schema, preventing invalid schema errors during structured output. [IJPL-230494]
  • Downloading the IDE backend now works as intended with a configured proxy. [IJPL-164318]
  • Resolved an issue that prevented successful proxy authentication. [IJPL-231829]
  • Package annotations referenced through JAR dependencies are now correctly reflected in the PSI model. [IDEA-383732]

To find out more details about the issues resolved, please refer to the release notes.

If you encounter any bugs, please report them to our issue tracker.

Happy developing!