Ownership in Rust

Ownership is Rust’s memory management system based on three rules:
each value has a single owner, only one owner can exist at a time, and a value is dropped when its owner goes out of scope.
Values are either moved (ownership is transferred) or copied (for simple Copy types like integers).

This system allows Rust to guarantee memory safety at compile time, without a garbage collector.

Value is dropped when its owner goes out of scope

fn main() {
    let name = String::from("Pixy");
    take_ownership(name);
}

fn take_ownership(s: String) {
    println!("{}", s);
} // s goes out of scope here → dropped

Here, ownership of name is moved into take_ownership.
When the function ends, s goes out of scope and Rust automatically frees the memory.

Ownership is transferred (moved)

fn main() {
    let username = String::from("Pixy");
    print_user(username);
}

fn print_user(name: String) {
    println!("User: {}", name);
}

Passing username into print_user moves ownership.
After the move, main can no longer access username. Only one owner exists at a time.

Function takes ownership

fn take(s: String) {
    println!("{}", s);
}

fn main() {
    let name = String::from("Pixy");
    take(name);
}

The function parameter s becomes the new owner.
Once take finishes, the value is dropped.

Borrowing with immutable references

fn borrow(s: &String) {
    println!("{}", s);
}

fn main() {
    let name = String::from("Pixy");
    borrow(&name);
    println!("{}", name);
}

Here, the function borrows name using &String.
Ownership stays in main, so name is still usable afterward.

Multiple immutable references at the same time

Rust allows multiple immutable references to the same value at the same time, as long as no one is mutating it.

fn main() {
    let name = String::from("Pixy");

    let ref1 = &name;
    let ref2 = &name;

    println!("{} {}", ref1, ref2);
}

This works because:

  • Both ref1 and ref2 are read-only
  • Ownership still stays with name
  • No data race is possible when only reading

Borrowing rule summary

  • ✅ Multiple immutable references are allowed
  • ✅ One mutable reference is allowed
  • ❌ Mutable and immutable references cannot coexist

This rule is what lets Rust be strict and flexible at the same time.

Borrowing with mutable references

fn change(s: &mut String) {
    s.push_str("!");
}

fn main() {
    let mut name = String::from("Pixy");
    change(&mut name);
}

Mutable borrowing allows modifying a value without taking ownership.
Rust ensures only one mutable reference exists at a time, preventing data races.

Final thought

Ownership, moves, and borrowing work together to prevent memory leaks, use-after-free errors, and data races — all without runtime overhead.

An Overview of EIP-3009: Transfer With Authorisation

I’ve never been good with the EIP numbers, so if you are like me and wondering what this is about, this EIP is about making authorisation and transfer more user friendly.

One of the most persistent points of friction for web3 devs has been the user experience of on-chain transactions. EIP-3009, titled “Transfer With Authorisation,” is a crucial (though still “Draft” status) protocol that directly tackles this problem.

While often discussed alongside other standards, EIP-3009 is a specific ERC-20 extension that, once implemented by a token, provides a new way to move assets. Its adoption by major stablecoins like USDC has made it a foundational component for the emerging machine-to-machine economy.

The Problem: Gas Fees and Clunky UX

Before EIP-3009, paying for something with an ERC-20 token was a famously clunky, two-step process for a user:

  1. The approve Transaction: A user must first send a transaction to the token contract, calling the approve function to allow a smart contract to spend tokens on their behalf. This costs a gas fee.
  2. The transferFrom Transaction: The user (or the smart contract) must then send a second transaction, calling transferFrom to actually move the tokens. This costs another gas fee.

This flow presents two critical problems:

  • Bad User Experience: It requires two separate transactions, two gas fees, and two wallet pop-ups.
  • The Gas Token Problem: The user must hold the network’s native token (e.g., ETH on Ethereum) to pay for gas, even if they only want to spend their USDC. This is a massive onboarding barrier for new users and a non-starter for autonomous AI agents that cannot easily manage multiple wallet balances.

How EIP-3009 Works: The “Gasless” Authorisation

EIP-3009 solves this by introducing the concept of meta-transactions for transfers. Instead of sending an on-chain approve transaction, the user signs an off-chain message that authorises a transfer.

This flow is designed to be handled by a third-party “relayer” or “facilitator.”

  1. Step 1: Off-Chain Signing (The Client)
    The user (or an AI agent’s wallet) does not create a transaction. Instead, it creates a structured, EIP-712 compliant typed message. This message contains the precise details of the transfer:

    • The token holder’s address (from).
    • The recipient’s address (to).
    • The value to be transferred.
    • A validAfter and validBefore timestamp (to prevent replay attacks).
    • A unique, random nonce (a bytes32 hash).

    The client signs this message with its private key, producing a cryptographic signature.

  2. Step 2: The Relayer (The Facilitator)
    The client sends this signed message (the authorisation) to a relayer. This relayer can be any service willing to submit the transaction and pay the gas fee (e.g., the x402 facilitator).

  3. Step 3: On-Chain Execution (The Contract)
    The relayer takes the signed message and calls a new function on the ERC-20 contract: transferWithAuthorization(...).

    This function accepts the signed message parameters (from, to, value, nonce, signature, etc.). The token contract itself then performs the following logic:

    • It reconstructs the EIP-712 message.
    • It uses ecrecover to verify that the signature matches the from address.
    • It checks that the nonce has not been used before.
    • It confirms the current time is within the validAfter and validBefore window.

    If all checks pass, the contract executes the transfer internally. The user’s tokens are moved, and the relayer (who called the function) pays the gas fee.

Key Technical Features for Developers

For developers, two features of EIP-3009 are particularly important:

  • Atomic Transfer: Unlike EIP-2612 (permit), which only authorises an approval, EIP-3009 authorises the entire transfer. It is a single-call execution.
  • Non-Sequential Nonces: A traditional Ethereum account uses a sequential nonce (0, 1, 2, 3…). This creates a bottleneck, as you cannot process transaction 3 until 2 is confirmed. EIP-3009’s nonce is a random bytes32 hash.
    This is a critical design choice for high-frequency systems, as it allows an agent to generate thousands of concurrent, independent payment authorisations without any of them conflicting.

The Problem: A Fragmented Standard

If you are thinking we have been here before, well yes, there have been a few attempts to solve this problem.
In fact EIP-3009’s primary weakness is not technical but strategic: it is not the only standard. This has fragmented the ecosystem:

  • EIP-3009 (transferWithAuthorization): The standard for gasless transfers. Implemented by Circle for USDC (v2).
  • EIP-2612 (permit): A similar but incompatible standard for gasless approvals. Implemented by Maker for DAI.
  • No Standard: Tether (USDT), the largest stablecoin by market cap, implements neither standard and has stated it has no plans to.

This “token exclusivity” is the main limitation of protocols that rely on EIP-3009. While it provides a seamless experience for USDC, it cannot (by itself) support a truly chain-agnostic or token-agnostic payment layer, as it excludes a massive portion of the stablecoin market.
Despite this, I wanted to introduce this EIP to you as background for some our next articles about the x402 protocol.

Originally published on: academy.extropy.io

🏆 The Most-Watched React, Next.js, Vue, Nuxt & Vite Talks of 2025 (so far)

Happy Tuesday 👋 and welcome to another special edition of Tech Talks Weekly!

This edition includes the most-watched talks in the React and Vue ecosystem in 2025 so far. If you’re interested in how this list was built, head over the last section.

Get ready for a bit of scrolling, but it’s worth it!

With that said, expect your watchlist to grow!

img

Join 7,500+ Software Engineers & Engineering Leads who receive a free weekly email with all the recently published podcasts & conference talks. Stop scrolling through messy YouTube/RSS feeds. Stop FOMO. Easy to unsubscribe. No spam, ever.

img

React & Next.js

  1. “Modern React Patterns: Concurrent Rendering, Actions & What’s Next | Aurora Scharff at RUC 2025”+67k views ⸱ 10 Sep 2025 ⸱ 00h 26m 32s
  2. “Composition Is All You Need | Fernando Rojo at React Universe Conf 2025”+57k views ⸱ 08 Sep 2025 ⸱ 00h 22m 17s
  3. “React Query Exposed by Its Maintainer”+38k views ⸱ 03 Mar 2025 ⸱ 00h 19m 57s
  4. “TanStack is Your New Favorite Framework”+27k views ⸱ 04 Oct 2025 ⸱ 00h 25m 50s
  5. “What React Refs Can Do for You”+22k views ⸱ 20 Jan 2025 ⸱ 00h 17m 56s
  6. “Building Web Applications with Signals at Grammarly”+15k views ⸱ 28 Apr 2025 ⸱ 00h 28m 54s
  7. “Next.js Conf 25: Opening Keynote”+10k views ⸱ 24 Oct 2025 ⸱ 00h 44m 32s
  8. “Effective React: Lessons from 10 Years – Cory House – NDC Copenhagen 2025”+8k views ⸱ 03 Nov 2025 ⸱ 00h 59m 45s
  9. “React Compiler Internals”+8k views ⸱ 14 Jul 2025 ⸱ 00h 21m 08s
  10. “Building Scalable Applications | Christoph Nakazawa at React Universe Conf 2025”+7k views ⸱ 08 Sep 2025 ⸱ 00h 25m 13s
  11. “SPA to SSR and Everything in Between”+6k views ⸱ 18 Jul 2025 ⸱ 00h 21m 24s
  12. “Why Your App Needs a Reactive Database”+6k views ⸱ 23 Jan 2025 ⸱ 00h 20m 00s
  13. “Marco Roth – Introducing ReActionView: An ActionView-Compatible ERB Engine”+5k views ⸱ 15 Sep 2025 ⸱ 00h 28m 42s
  14. “Hands On: How To Migrate To Next.js 16 and “Use Cache””+5k views ⸱ 04 Nov 2025 ⸱ 00h 37m 00s
  15. “Type-safe URL state in Next.js with nuqs”+4k views ⸱ 13 Nov 2025 ⸱ 00h 25m 09s
  16. “Don’t Build a Multi-Tenant App Until You Watch This!”+4k views ⸱ 24 Feb 2025 ⸱ 00h 12m 40s
  17. “React Devs, Here’s Why You Should Give AI Another Chance”+3k views ⸱ 28 Feb 2025 ⸱ 00h 30m 09s
  18. “Next.js for AI Agents”+3k views ⸱ 17 Nov 2025 ⸱ 00h 25m 43s
  19. “Unlocking Observability with React & Node.js | Mohit Menghnani | Conf42 SRE 2025”+3k views ⸱ 04 Jul 2025 ⸱ 00h 17m 07s
  20. “Beyond REST: Using Full-Stack Signals for Real-Time Reactive UIs by Leif Åstrand @ Spring I/O 2025”+2k views ⸱ 27 Aug 2025 ⸱ 00h 45m 09s

Vue, Nuxt & Vite

  1. “Evan You | Vite Beyond a Build Tool | ViteConf 2025”+26k views ⸱ 13 Oct 2025 ⸱ 00h 36m 54s
  2. “Jim Dummett | JavaScript at the speed of Rust: Oxc | ViteConf 2025”+13k views ⸱ 14 Oct 2025 ⸱ 00h 29m 16s
  3. “What’s New in Vite Explained by Its Creator”+12k views ⸱ 22 Jul 2025 ⸱ 00h 23m 00s
  4. “Anthony Fu | Vite Devtools | ViteConf 2025”+9k views ⸱ 15 Oct 2025 ⸱ 00h 29m 22s
  5. “Rich Harris | Remote Control | ViteConf 2025”+8k views ⸱ 11 Nov 2025 ⸱ 00h 25m 40s
  6. “Vite 6 Explained by Its Maintainer”+3k views ⸱ 21 Jan 2025 ⸱ 00h 20m 15s
  7. “State of Vite and Vue 2025 by Creator Evan You”+3k views ⸱ 03 Jun 2025 ⸱ 00h 42m 18s
  8. “Matt Kane | The Future of Astro | ViteConf 2025”+3k views ⸱ 28 Oct 2025 ⸱ 00h 29m 23s
  9. “Jessica Sachs | Vitest Browser Mode | ViteConf 2025”+3k views ⸱ 24 Oct 2025 ⸱ 00h 27m 23s
  10. “Alexander Lichter | Rolldown: How Vite bundles at the speed of Rust | ViteConf 2025”+3k views ⸱ 16 Oct 2025 ⸱ 00h 25m 00s
  11. “Pooya Parsa | Vite + Nitro: The Full Stack Era | ViteConf 2025”+2k views ⸱ 21 Oct 2025 ⸱ 00h 26m 03s
  12. “Kevin Deng | tsdown: One tool to bundle them all | ViteConf 2025”+2k views ⸱ 17 Oct 2025 ⸱ 00h 21m 39s
  13. “Vue.js Nation 2025: Michael Thiessen – How to write better composables”+2k views ⸱ 06 Feb 2025 ⸱ 00h 27m 01s
  14. “Vue.js Nation 2025: Eduardo San Martin Morote – Clean Async State Management”+2k views ⸱ 07 Feb 2025 ⸱ 00h 49m 38s
  15. “Daniel Roe | Future of Nuxt and Vite | ViteConf 2025”+2k views ⸱ 31 Oct 2025 ⸱ 00h 23m 15s
  16. “Yann Braga | Storybook Vitest | ViteConf 2025”+2k views ⸱ 29 Oct 2025 ⸱ 00h 23m 52s
  17. “Vladimir Sheremet | The State of Vitest | ViteConf 2025”+1k views ⸱ 20 Oct 2025 ⸱ 00h 22m 52s
  18. “Nuxt 4.0 Is Here! What’s that mean for you?”+1k views ⸱ 23 Jul 2025 ⸱ 00h 12m 43s
  19. “Vue.js Nation 2025: Rizumu Ayaka – Join Us Building Vue’s High-Performance Future: Vapor Mode”+1k views ⸱ 07 Feb 2025 ⸱ 00h 19m 10s
  20. “Panel | Future of the Web | ViteConf 2025”+1k views ⸱ 05 Nov 2025 ⸱ 00h 29m 04s

Behind the scenes

You might wondering how this list was built.

To ensure correctness, I have not used AI, but instead, using a set of Python scripts, I scanned the following conferences (Dec 1st):

  • JSWORLD Conference
  • JSNation
  • VueConf
  • ViteConf
  • Next.js Conf
  • CascadiaJS
  • React Day Berlin
  • React Summit
  • React Universe Conf
  • as well as over 100 more conferences to ensure complete coverage.

As you can see, these include both frontend/full stack ones as well as those that are not related but included relevant talks.

Voilà!

Please let me know what you think.

Leave a comment

Join 7,500+ Software Engineers & Engineering Leads who receive a free weekly email with all the recently published podcasts & conference talks. Stop scrolling through messy YouTube/RSS feeds. Stop FOMO. Easy to unsubscribe. No spam, ever.

img

This issue is free for everyone, so feel free to share it or forward it:

Share

Enjoy ☀️ and see you again on Thursday!

How to Integrate Resend in ASP.NET Core | Email API Guide

Complete guide to integrating Resend email API into ASP.NET Core applications. Send transactional emails reliably with Resend’s modern email infrastructure.

Introduction

Sending reliable transactional emails from your ASP.NET Core application is critical—password resets, order confirmations, notifications, and user communications all depend on email delivery. But email infrastructure is notoriously complex: managing SMTP servers, handling bounces, avoiding spam folders, and monitoring delivery rates requires significant operational overhead.

Resend is a modern email API that eliminates this complexity. Instead of managing SMTP or using traditional providers like SendGrid, you integrate Resend’s streamlined API into your ASP.NET Core application and send emails with a few lines of code.

Resend handles deliverability, bounce management, authentication (SPF, DKIM, DMARC), and detailed analytics—you just send the email and trust it arrives.

In this guide, we’ll break down what’s involved in integrating Resend into an ASP.NET Core application from a developer’s perspective, why this integration matters, and how the implementation process works.

Why Resend for ASP.NET Core Applications?

Resend stands out because it’s designed for developers. Its API is minimal and intuitive, the documentation is clear, and delivery reliability is excellent. Unlike traditional SMTP or complex platforms, Resend integrates in minutes, not weeks. You get professional email infrastructure without the operational burden.

Email deliverability affects user trust, compliance, and customer experience. Resend’s infrastructure ensures your emails reach inboxes consistently—critical for password resets, payment confirmations, and security notifications.

SCOPE OF WORK

Here’s what a developer needs to accomplish to integrate Resend into an ASP.NET Core application:

1. Resend Account Setup & Configuration

  • Create Resend account and project
  • Generate API keys
  • Configure sender domain and verify ownership
  • Set up DNS records for SPF, DKIM, DMARC
  • Configure reply-to addresses
  • Set up webhooks for bounce and delivery notifications
  • Document API credentials and environment configuration

2. ASP.NET Core Project Setup

  • Add Resend NuGet package to project
  • Configure dependency injection for email service
  • Set up configuration management for API keys
  • Implement User Secrets or Azure Key Vault for credential storage
  • Create service interfaces for email service abstraction
  • Set up structured logging with Serilog or Microsoft.Extensions.Logging

3. Email Service Implementation

  • Create email service class wrapping Resend API client
  • Implement methods for sending transactional emails
  • Build email template loading and rendering logic
  • Handle email composition (to, from, subject, body, attachments)
  • Implement async/await patterns for non-blocking email sending
  • Create helper methods for common email scenarios (welcome, password reset, notifications)

4. Template Management & Rendering

  • Design email templates with HTML and CSS
  • Implement template placeholder replacement (name, verification link, etc.)
  • Create Razor templates or use separate template files
  • Handle template versioning and updates
  • Test email rendering across email clients
  • Implement inline CSS for email compatibility

5. Error Handling & Retry Logic

  • Implement exception handling for API failures
  • Build exponential backoff retry mechanisms
  • Create fallback email delivery strategies
  • Implement circuit breaker pattern for resilience
  • Log failures with context for debugging
  • Handle rate limiting gracefully
  • Create dead-letter queue for failed emails

6. Webhook Integration for Delivery Events

  • Set up webhook endpoints to receive bounce and delivery notifications
  • Implement request validation for webhook security
  • Parse webhook payloads (delivery status, bounce type, reason)
  • Update email delivery status in application database
  • Implement unsubscribe handling
  • Log bounce events for monitoring and compliance
  • Create alerts for high bounce rates

7. Email Validation & Sanitization

  • Validate email addresses before sending
  • Implement input sanitization to prevent injection
  • Check against block lists and invalid addresses
  • Validate attachment types and sizes
  • Implement rate limiting per user/IP
  • Create verification for sender domains
  • Handle special characters and encoding

8. Configuration & Environment Management

  • Store Resend API keys securely
  • Configure separate API credentials for development, staging, production
  • Implement feature flags for email sending (test mode, production mode)
  • Set up environment variables for configuration
  • Create test email addresses for development
  • Implement email preview functionality
  • Document configuration requirements

9. Testing & Quality Assurance

  • Write unit tests for email service logic
  • Create integration tests with Resend sandbox environment
  • Test email template rendering and placeholder replacement
  • Test error scenarios and retry logic
  • Verify webhook payload parsing
  • Load test email sending under high volume
  • Test across multiple email clients for rendering

10. Monitoring, Logging & Deployment

  • Implement application insights or logging for email metrics
  • Create dashboards for email delivery rates and bounce rates
  • Set up alerts for delivery failures
  • Monitor API usage and quota limits
  • Create runbooks for troubleshooting email issues
  • Document deployment requirements and configuration
  • Plan for security updates and credential rotation

HOW FLEXY CAN HELP?

Integrating Resend into ASP.NET Core requires coordinating multiple pieces: API integration, email template management, error handling, webhook parsing, and comprehensive testing. While individually these aren’t difficult, the full implementation requires careful design to ensure reliability, security, and maintainability.

This is where Flexy specializes:

Rather than your development team spending 2–3 weeks implementing and testing Resend integration, Flexy can deliver production-ready email infrastructure at a fixed cost. Our developers have deep expertise in ASP.NET Core, Resend API, and email system architecture.

What Flexy Delivers:

  • Complete Resend email service integrated with your ASP.NET Core application
  • Reusable email service class with common email templates and patterns
  • Webhook handler for bounce, delivery, and complaint notifications
  • Error handling and retry logic for production reliability
  • Complete documentation with setup instructions and usage examples
  • Unit and integration tests covering major scenarios
  • Fixed pricing — no hourly billing, transparent costs

Why This Matters:

  1. Speed: What takes your team 3–4 weeks takes Flexy 4–5 days
  2. Expertise: Deep knowledge of both ASP.NET Core and email infrastructure
  3. Reliability: Production-ready implementation with error handling and monitoring
  4. Risk Reduction: Proper testing prevents email delivery failures
  5. Focus: Your team builds features while Flexy handles email infrastructure

Instead of diverting engineers to email implementation, Flexy builds reliable email delivery while your team focuses on core product. Your users get consistent, dependable transactional emails without months of development.

Conclusion

Building reliable email infrastructure requires careful consideration of deliverability, error handling, and monitoring. A poorly configured email system leads to missed notifications, user frustration, and support overhead.

If your ASP.NET Core application needs Resend integration but your team lacks bandwidth (or email infrastructure expertise) to implement it properly, Flexy delivers production-ready email in days, not weeks. We handle API integration, template management, webhook parsing, and testing so you don’t have to.

Get a free quote. Describe your email requirements, template needs, and delivery scenarios, and we’ll provide transparent pricing and timeline.

Get a Free Quote for Your Resend Integration

How to Extract a Web Table with Infinite Scrolling Using UiPath?

Hi everyone!

Welcome back to Quick Automation Talk, Today, we are looking at something many of you struggle with when scraping websites. How do you extract a web table that keeps loading new rows only when you scroll?

If you tried scraping it the normal way, you already know that UiPath grabs only the visible part. The rest stays hidden behind the infinite scroll. The good news is that you can still extract the full table if you follow the right setup. Here is a clear and practical way to do it so you can collect complete data without missing any row.

Process of Extracting a Web Table with Infinite Scrolling Using UiPath

Before you jump into UiPath Studio, it helps to know what flow you are about to follow. Once you understand this flow, the steps below become very easy to follow.

Step 1: Understand How the Page Loads More Rows

Before you open UiPath Studio, visit the website and check how the page behaves. Scroll down slowly and watch how new rows appear. If more rows load after a small scroll, it means the page uses infinite scrolling. UiPath will not capture those rows unless you scroll through the entire table during automation.

Step 2: Use the Data Scraping Wizard for the Basic Pattern

Open UiPath Studio and start with the Data Scraping Wizard. Select two rows from the table so UiPath can understand the structure. The wizard collects the visible data first. Once the preview looks correct, save the activity. This gives you the extraction pattern that UiPath will follow on the full page.

Step 3: Add a Loop and Scroll Action

To capture new rows, you need UiPath to scroll the page again and again. You can do this with a simple loop.
A common approach is:

  • Use a While loop
  • Add a Send Hotkey activity inside the loop
  • Use Page Down or End key to move the scroll
  • Each time the page scrolls, new rows load and UiPath can scrape more data.

Keep the scroll smooth so the website has enough time to load the next set of rows.

Step 4: Detect When the Table Reaches the End

Your loop should stop only when there are no more new rows. To do this, you can check the row count after each extraction. If the row count does not increase after a scroll, it means you reached the bottom. This small check prevents endless scrolling and saves time.

Step 5: Combine All Extracted Data

Each scroll round generates fresh data. Merge all these results into a single DataTable. UiPath lets you use Merge Data Table to combine the results. When the merge finishes, you get the complete dataset from the start of the table to the end of the table.

Step 6: Export the Data

Once your DataTable is ready, save it as Excel, CSV, or any other format your project needs. This is a simple step with Write Range. Your file will now have all the rows that were hidden behind the infinite scroll.

Helpful Tips to Make the Extraction Smooth

  • Add a short delay after each scroll so the website can load new rows
  • Scroll small steps instead of jumping directly to the bottom
  • Make sure the selector for the table is stable and does not break when new rows load
  • Test your workflow with fewer scrolls first to avoid long run times

Final Thoughts

You can extract a web table with infinite scrolling in UiPath if you guide the robot through the full length of the page. All you need is a simple pattern. First, scrape what is visible, then scroll in a loop, merge all the data, and export it.

you can always choose to hire UiPath developers who can build this workflow quickly and make it reliable for large datasets. With the right approach, you get smooth automation and complete data every time.

🚀 Breaking the Blockade: How We Taught Kafka to “Speak” Like a Synchronous API

Imagine the situation: Our system, let’s call it “BSDFlow”, is a modern, impressive Event-Driven monster. Everything happens asynchronously, reliably, and scalably through Kafka. Every entity creation and data update flows through the data pipelines like water.

Sounds like an architectural dream, right? Well, there’s a catch. And that catch starts when the user at the other end clicks a button.

The Dilemma: When the User Doesn’t Want to Wait 🐢

We live in a world of instant gratification. When we click “Save” in React, we expect to see a success message immediately (or an error, if we failed validation).

In a classic Event-Driven architecture, it works something like this:

  1. The client sends a command.
  2. The server throws the command into Kafka (like a message in a bottle).
  3. The server returns an immediate response to the client: “Got it, working on it!”.

But the client? They aren’t satisfied 😠. This answer tells them nothing. They don’t know if the .NET Backend actually processed the data, or if it hit an error along the way. The user needs a final and definitive answer.

This gap, between the speed of the Event and the need for an API response, is the blockade we had to break.

The Magic: A Promise with an ID ✨

The solution we developed allows the user to get an immediate response, while behind the scenes, everything remains asynchronous and safe. We turned our Node.js Middleware into a smart control unit.

The secret lies in the combination of a Promise Map and a Correlation ID.

How Does It Actually Work?

The process consists of three simple but brilliant steps:

1. The Middleware Steps In
When the request arrives from the Frontend, we generate a correlationId – think of it as a unique ID card for the request. We create a Promise, store it in memory within a data structure we called a Promise Map, and just… wait. We launch the message to Kafka, with the ID and the “Reply Topic” name attached to the message headers. The Middleware essentially gets an order: “Stop and await response” (await promise).

2. The Round Trip
The Backend (in our case, a .NET microservice) consumes the command, does the hard work (like a DB update), and at the finish line – sends a reply message to the Reply Topic we defined earlier. The most important part? It attaches the exact same correlationId to the reply.

3. The Resolve
Our Middleware, which is still waiting, constantly listens to the Reply Topic using a dedicated Consumer. The moment an answer arrives, it checks the ID, pulls the matching Promise from the Map, and releases it (resolve).

The result? The client gets a full, final answer, and the user enjoys a smooth experience, without knowing what a crazy journey their message just went through.

Show Me The Code 💻

We’ve talked a lot, now let’s see what this magic looks like in TypeScript. This is the heart of the mechanism in Node.js:

import { v4 as uuidv4 } from 'uuid'; 

// The map that holds all requests waiting for a reply
const pendingRequests = new Map();

async function sendRequestAndWaitForReply(command: any): Promise<any> {
    const correlationId = uuidv4();

    // Create a Promise and store it in the map with a unique ID
    const promise = new Promise((resolve, reject) => {
        // ... It's a good idea to add a Timeout here so we don't wait forever ...
        pendingRequests.set(correlationId, { resolve, reject });
    });

    // Send the message to Kafka (including the correlationId in headers)
    await kafkaProducer.send({ 
        topic: 'commands-topic',
        messages: [{ 
            key: correlationId, 
            value: JSON.stringify(command), 
            headers: { correlationId: correlationId, replyTo: 'reply-topic' } 
        }] 
    });

    return promise; // Wait patiently!
}

// When the answer arrives from the Reply Topic, our code does this:
function handleReplyMessage(message) {
    const correlationId = message.headers['correlationId'];
    const pending = pendingRequests.get(correlationId);

    if (pending) {
        // We found the Promise that was waiting for us!
        pendingRequests.delete(correlationId);
        pending.resolve(message.value);
    }
}

Wrapping Up

Sometimes the best solutions are those that bridge worlds. In this case, bridging the asynchronous world of the Backend with the synchronous need of the Frontend allowed us to maintain a robust architecture without compromising on user experience.

Have you encountered a similar problem? Have you implemented Request-Reply over Kafka differently? I’d love to hear about it in the comments! 👇

Why I Chose Monorepo: From Copy-Paste Hell to 2.8s Builds

Why I Chose Monorepo: From Copy-Paste Hell to 2.8s Builds

Friday, 11:47 PM. Portfolio site: white screen. Button component broke.

I’d updated the variant prop in my UI library repo. Pushed it. Forgot the portfolio had its own copy of Button.tsx—same name, different version, same breaking change.

Three repos. Three copies of the same component. Two of them broken.

That’s when I knew: the copy-paste had to stop.

TL;DR

What I did: Merged 3 separate repos (portfolio, web app, CLI) into one monorepo with shared packages.

The wins:

  • Builds: 5min 23s → 2.8s (95% cache hits with Turborepo)
  • Code duplication: ~40% → 0%
  • Type safety: Instant across all packages (no more publish-to-test)
  • DX: Change Button, see it update in 3 apps immediately

Setup time: 30 minutes

Would I do it again? Absolutely.

Keep reading for: The breaking point moment, what I tried, how it actually works, and 3 gotchas that cost me 4 hours.

The Problem

I’m building CodeCraft Labs—a portfolio site, a web playground, and eventually a CLI tool. React 19, TypeScript 5.6, Next.js 16, Tailwind v4. Solo dev for now, planning to bring on 2-3 people eventually.

The multi-repo nightmare:

Repository #1: portfolio (Next.js app)
Repository #2: web-prototype (React app)

Repository #3: ui-library (shared components)

What Actually Broke

I had a Button component. 230 lines. Used in both apps.

Initially: one repo, npm published as @​ccl/ui. Worked great.

Then I needed to iterate fast. Publishing to npm every time I changed padding? Painful. So I copy-pasted Button.tsx into both apps. “Just temporarily,” I told myself.

Three months later: three versions of Button.tsx, all diverged.

The breaking change:

// ui-library repo (v1.2.0)
export interface ButtonProps {
  variant: 'primary' | 'secondary' | 'ghost';
  onClick?: () => void;
}

// What I changed it to (v1.3.0)
export interface ButtonProps {
  variant: 'primary' | 'secondary' | 'ghost';
  onClick?: () => Promise<void>; // Added async support
}

Updated portfolio. Deployed. Worked.

Forgot the web-prototype had its own copy. It didn’t get the update. onClick handlers broke. Saturday morning: emails.

The Real Cost

Time waste:

  • Each shared component update: 15-20 minutes to sync across repos
  • Frequency: 5-10 updates per day
  • Daily cost: ~2+ hours of copy-paste coordination

What killed me:

  • TypeScript couldn’t catch cross-repo breakages (only failed after npm publish → install → build)
  • Three CI/CD pipelines to maintain
  • Deployment coordination (“Did I update all three?”)
  • Version drift anxiety

The moment I decided to change:
Saturday, 2:47 AM. Fixed the Button bug in 5 minutes. Spent 2 hours questioning if I wanted to keep doing this for the next year.

What I Looked At

Option 1: Keep Multi-Repo, Use npm link

The promise: Symlink local packages, no publishing needed.

Reality: npm link is… not great.

Tried it for a week:

  • Had to run npm link after every clean install
  • Forgot to re-link after switching branches: “Module not found” errors
  • Works on my machine, broke in CI
  • Gave up

Option 2: Git Submodules

The promise: Nest repos, share code via git.

Why I skipped it: Everyone who’s used git submodules told me “don’t use git submodules.” Listened to them.

Option 3: Monorepo (Turborepo + pnpm workspaces)

The promise:

  • One repo, multiple packages
  • Import local packages like npm packages (but instant)
  • TypeScript sees everything
  • Build caching makes builds stupid fast

Why I picked it:

  • pnpm workspaces handle package linking automatically (no more npm link hell)
  • Turborepo caches build outputs (only rebuild what changed)
  • Vercel built Turborepo, and I deploy on Vercel (figured integration would be good)

Setup took 30 minutes. Been using it for 6 months. Zero regrets.

How It Actually Works

Two tools doing different jobs:

pnpm workspaces = package manager

Turborepo = build orchestrator

The Structure

codecraft-labs/
├── apps/
│   ├── portfolio/          # Next.js → Vercel
│   ├── web/                # React app → Vercel
│   └── cli/                # Node.js CLI → npm
│
├── packages/
│   ├── ui/                 # Component library
│   │   ├── src/
│   │   │   ├── Button.tsx
│   │   │   └── ...
│   │   └── package.json    # name: "@​​ccl/ui"
│   └── typescript-config/  # Shared tsconfig
│
├── pnpm-workspace.yaml     # Defines workspaces
├── turbo.json              # Build pipeline
└── package.json            # Root dependencies

How pnpm Workspaces Link Packages

# pnpm-workspace.yaml
packages:
  - 'apps/*'
  - 'packages/*'
// apps/portfolio/package.json
{
  "dependencies": {
    "@​​ccl/ui": "workspace:*"  // Links to packages/ui/
  }
}

Run pnpm install. That’s it. pnpm creates symlinks:

apps/portfolio/node_modules/@​​ccl/ui → ../../packages/ui/

Now you can import:

// apps/portfolio/src/app/page.tsx
import { Button } from '@​​ccl/ui';

<Button onClick={async () => {
  await saveData();
}}>
  Save
</Button>

TypeScript sees the real source file in packages/ui/src/Button.tsx. Immediate type checking. No publishing. No version mismatches.

How Turborepo Makes Builds Fast

// turbo.json
{
  "tasks": {
    "build": {
      "dependsOn": ["^build"],
      "outputs": ["dist/**", ".next/**"]
    }
  }
}

Run turbo build:

  1. Analyzes dependency graph: Portfolio depends on @​ccl/ui
  2. Builds in order: @​ccl/ui first, then portfolio
  3. Caches outputs: Hashes inputs (source files, deps, config), stores outputs in .turbo/cache/
  4. Skips unchanged packages: If @​ccl/ui hasn’t changed, uses cached build (0.3s instead of 8.2s)

Real numbers from my project:

  • First build: 62.4s (cold, everything compiles)
  • Second build: 2.8s (95% cache hit)
  • Changed Button.tsx only: 8.1s (rebuilds @​ccl/ui + portfolio, skips web + cli)

That’s 22x faster than before.

The Migration

What I Did (30 minutes total)

1. Created monorepo structure (5 min)

mkdir codecraft-labs
cd codecraft-labs
pnpm init

Created pnpm-workspace.yaml:

packages:
  - 'apps/*'
  - 'packages/*'

2. Moved existing repos (10 min)

mkdir apps packages
mv ~/old-repos/portfolio apps/
mv ~/old-repos/web apps/
mv ~/old-repos/ui-library packages/ui

Updated each package.json to use @​ccl/ scope:

// packages/ui/package.json
{
  "name": "@​​ccl/ui",
  "version": "1.0.0"
}

3. Installed Turborepo (2 min)

pnpm add -Dw turbo

Created minimal turbo.json:

{
  "tasks": {
    "build": {
      "dependsOn": ["^build"],
      "outputs": ["dist/**", ".next/**"]
    },
    "dev": {
      "cache": false,
      "persistent": true
    }
  }
}

4. Updated imports (10 min)

Updated imports to use workspace packages:

import { Button } from '@​​ccl/ui';

5. Tested

pnpm install
turbo build
turbo dev

Worked. First try.

(That never happens. I was suspicious.)

The 3 Gotchas That Cost Me 4 Hours

Gotcha #1: Peer dependency hell

Symptom: pnpm install failed with peer dependency errors.

Problem: Portfolio had React 19, web app had React 18, ui-library allowed both.

Fix: Align all React versions:

pnpm add react@​​19.0.0 react-dom@​​19.0.0 -w
pnpm install

Took 90 minutes to figure out. The error message was unhelpful.

Gotcha #2: TypeScript path mapping

Symptom: TypeScript couldn’t find @​ccl/ui types.

Problem: Needed explicit path mapping in tsconfig.

Fix:

// apps/portfolio/tsconfig.json
{
  "compilerOptions": {
    "paths": {
      "@​​ccl/*": ["../../packages/*/src"]
    }
  }
}

Spent 45 minutes on this. Should’ve read the pnpm docs first.

Gotcha #3: Cached build was stale

Symptom: Changed Button.tsx, rebuild was instant, but changes didn’t show up.

Problem: Turborepo cached old output, didn’t detect file change (I had modified file outside of git).

Fix:

turbo build --force  # Bypass cache

Or clear cache:

rm -rf .turbo/cache

Lost 90 minutes debugging this. Thought my code was broken. It was just cache.

What Changed

Before Monorepo

# Update Button component workflow
cd ui-library
# Make changes
npm version patch
npm publish
cd ../portfolio
npm install @​​ccl/ui@​​latest
npm run build  # 5min 23s
git push
cd ../web
npm install @​​ccl/ui@​​latest
npm run build  # 4min 47s
git push

# Total: 15-20 minutes, 3 repos, 3 deploys

After Monorepo

# Update Button component workflow
cd packages/ui
# Make changes
turbo build  # 2.8s (cached)
git commit -m "Update Button API"
git push

# Vercel deploys both apps automatically
# Total: <3 minutes, 1 repo, 1 commit

The Numbers

Metric Before After Improvement
Build time 5min 23s 2.8s 22x faster
Code duplication ~40% 0% Eliminated
Repos to manage 3 1 66% less
Time per update 15-20 min <3 min 85% faster
Type safety Publish-to-test Instant Immediate
CI/CD pipelines 3 1 Simplified

Time saved: ~2 hours daily (5-10 component updates × 15-20 min each → <3 min)

Rough ROI: If you value time at $50/hr, that’s $100/day = $2,000/month in saved time.

But honestly? The real win is not having to think about it anymore. I change Button.tsx, TypeScript catches issues instantly, deploy once, done.

When to Use Monorepo

Use monorepo if:

  • You have 2+ projects sharing code
  • You’re copy-pasting components between repos
  • You want type safety across packages
  • You value fast iteration over independent deployment

Don’t use monorepo if:

  • Single app with no shared code (unnecessary overhead)
  • Completely independent projects (no shared code = no benefit)
  • You need different tech stacks per project (Go backend, Python ML, Node.js frontend—monorepo doesn’t help much)

My context: Solo dev, 3 apps, heavy code sharing, deploying on Vercel. Monorepo was perfect.

Your context might differ. If you have 100+ packages or a team of 50+, look at Nx instead of Turborepo (more features, more complexity).

Final Thoughts

Would I do it again? 100% yes.

What surprised me:

  • Setup was way easier than expected (30 minutes, actually worked first try)
  • Cache hit rate stayed high (95%+) even with active development
  • TypeScript catching cross-package issues instantly is addictive
  • Refactoring is fearless now (rename function, TS shows all usages across all packages)

What I’d do differently:

  • Align all dependency versions before starting (would’ve saved 90 minutes)
  • Read pnpm workspace docs first (would’ve saved 45 minutes on path mapping)

Biggest surprise: Adding a new app takes <5 minutes now. Copy structure, link packages, done. Planning to add 3 more apps in next 6 months—would’ve been a nightmare in multi-repo.

Bottom line: If you’re managing 2+ projects that share code, monorepo in 2025 is a no-brainer.

Resources

Official Docs:

My Code:

Community:

Questions? Drop a comment or hit me up:

Twitter: @saswatapal14

LinkedIn: saswata-pal

Dev.to: @saswatapal

More tech decision breakdowns coming—React 19, Tailwind v4, Vitest, Biome.

Part of the Tech Stack Decisions series

Hashtag Jakarta EE #310

Hashtag Jakarta EE #310

Welcome to issue number three hundred and ten of Hashtag Jakarta EE!

The conference year is getting closer to the end. Last week, I was in Ottawa for JakartaOne Livestream 2025 and next week I will go to Paris to speak at the Paris JUG as well as attend Open Source Experience while I am there. These will be the last events for me in 2025, but as you can see on my list of events, I have quite a few lined up for the beginning of 2026. I update the list continuously, so make sure to check it out if you want to meet up at an event or possibly schedule me for your JUG or conference.

One of the talks at this year’s JakartaOne Livestream that caught my attention was about Eclipse Tradista by Olivier Asuncion. Eclipse Tradista is a risk management solution for the financial sector built with Jakarta EE. It is an excellent example of the benefits of Jakarta EE for applications build with a modular architecture.

The Jakarta EE Platform project didn’t meet last week due to JakartaOne Livestream, so I don’t have much to report on regarding Jakarta EE 12. Make sure to join the last two platform calls of the year on December 9 and 16. See details in the Jakarta EE Specifications calendar.

Ivar Grimstad


Why Cursor, Windsurf and co fork VS Code, but shouldn’t

Why Cursor, Windsurf and co fork VS Code, but shouldn’t

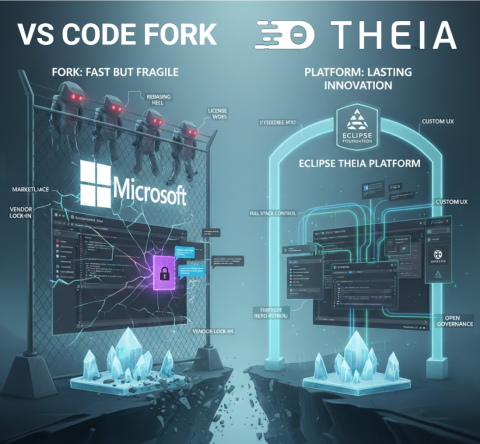
Forking VS Code gets you to market fast. Building on a platform gets you a product that lasts. Eclipse Theia is that platform.

Over the last two years, a wave of “AI native editors” has launched on top of a fork of Microsoft’s Visual Studio Code (VS Code). Cursor says it’s “built on VS Code”, Windsurf markets VS Code compatibility, and similar tools follow the same path. Cursor: https://www.cursor.com Windsurf Editor (Codeium): https://windsurf.com

On the surface this makes sense: you inherit a familiar UX and a huge extension ecosystem, and you can patch whatever the public extension API will not let you do. But forks come with hidden costs: ongoing rebasing, licensing puzzles, marketplace restrictions, and dependence on Microsoft’s governance.

Recent events have made this more concrete. In 2025, Microsoft extensions like the C and C++ tooling stopped working in Cursor and other forks, due to licensing and distribution enforcement. This is a good illustration of ecosystem risk when your product depends on a competitor controlled store.

In this article, we look at why well known products felt the need to go beyond the VS Code extension API, and why a platform approach is a better long term bet.

Image
Image showing on the left the VS Code Fork with many frightening robots, and on the right the Theia Platform with a much nicer set of tools

🔧 Extensible product vs platform to build a product

This conceptual distinction is crucial and often overlooked:

  • VS Code is an extensible product. It was designed as a developer tool first, with a stable API for third party extensions. That API is intentionally limited: it protects end users, keeps the UX coherent, and ensures Microsoft can evolve the product safely. But it was never designed as the foundation for other products.
  • A platform, by contrast, is designed for others to build on. It exposes deep, stable extension points across both frontend and backend, allows reshaping of the UX, and gives you governance over distribution and policy. A platform invites you to innovate, while an extensible product restricts you to safe, controlled add ons.

If you treat an extensible product like VS Code as if it were a platform, you hit walls quickly. Branding, reshaping the UX, embedding AI into every pane, or orchestrating application wide experiences push you beyond what the extension surface can do. That’s why so many teams end up considering a fork.

And this brings us to the following practical question:

⚠️ “Why not just use the extension API?”, where it runs out of road

Yes, you can ship impressive AI features as plain VS Code extensions today. The Marketplace has a long tail of AI tools. For example:

So why do Cursor, Windsurf, and other “AI native editors” still fork instead of “just using the API”? Because the differentiators they want, AI woven into every pane, proactive behaviour driven by global context, and ownership over distribution and governance, live beyond what the extension surface is designed to allow.

VS Code’s extension API is deliberately stable and constrained. That’s good for end users, it is limiting for teams trying to build product level experiences. Conceptually, adding a menu, command, or extra view is squarely in extension territory, but branding, reshaping the UX, or deeply weaving AI into the core experience quickly pushes you outside those safe boundaries. The examples below illustrate where this line gets crossed in practice.

Full stack control matters Building a compelling AI native product is not just about what happens in the editor. You need full stack control: how do you host the system? how do you integrate it with LLMs, web UIs, version control backends, custom deployment pipelines, or proprietary data sources? An extension runs in someone else’s sandbox. A platform lets you own the entire stack, from backend services to frontend UX, and wire them together however your product demands.

The Copilot advantage, governance over the API surface You might wonder why GitHub Copilot seems so well integrated in VS Code. The reason is simple: Microsoft opened explicit internal and provisional APIs for this extension over time. They could do this because they have the sources of VS Code under their control. Other vendors do not have this type of governance advantage. If you’re building a competing AI tool, you’re stuck with the public, stable API, while your competitor gets to shape the platform to fit their needs.

A few examples that frequently push teams to fork:

1) Custom chat UX, often the heart of AI native products Chat is frequently the primary interface for AI native editors, yet VS Code’s chat API is only partially extensible. You can contribute chat participants and commands, but you cannot tailor the chat panel’s layout, styling, or interaction patterns to match your product vision. Almost all forks, and even many VS Code extensions, build their own custom chat windows as a result. For extensions, these separate chat implementations often lack full integration with the rest of the workbench, creating a disjointed experience. For forks, custom chat becomes possible but adds to the maintenance burden. If chat is central to your product’s identity, the built in chat surface won’t let you differentiate.

2) True overlay or embedded AI in any view (Explorer, Terminal, Debug, Problems) Extensions can add views and webviews, decorate text, and place context menu entries, but cannot freely render overlays into Microsoft’s built in views. Even seemingly simple tasks, like reacting to hover or selection in the built in File Explorer, lack public events. The UX guidelines nudge you to context menus or new panels, not invasive overlays. If your product vision needs first class, in place AI everywhere, you hit walls quickly.

3) Observability of user activity across the workbench You can observe text document edits and active editor changes. But there is no comprehensive, supported activity stream API for everything a user does across built in views, and the few window level signals that exist are limited and have rough edges. For proactive AI that reacts to what just happened anywhere, you’ll end up resorting to fragile workarounds, or a fork.

4) Terminal output and non editor context Terminal APIs have historically required proposed or limited contracts. Reading raw output reliably from all terminals is not a stable, generally available capability for Marketplace extensions. That makes terminal aware copilots harder to ship purely as a VS Code extension.

5) Global editor state and multi editor context You can inspect the active editor and the set of visible editors, but a complete inventory of open editors and their state is not cleanly exposed as a first class, stable API. The long trail of issues and discussions around open editors illustrates how tricky this is for extension authors who need holistic context.

6) Full control over debug sessions You can start sessions and send Debug Adapter Protocol requests via DebugSession customRequest, and many scenarios work. But building a product that orchestrates multi session debugging, steps intelligently, and cross links with other views means living with adapter differences, fragile command execution, and no guarantees for non standard actions. That’s fine for an extension. It is a risky foundation for a product’s core UX.

7) Competing with, or coordinating, other extensions VS Code now has inline completions and AI chat APIs, but precedence and interaction between providers isn’t something extensions can reliably control. Co existence works in many cases, but you can’t build a product that depends on always winning over someone else’s extension.

And when you outgrow the API, you’re tempted to fork. That’s exactly the trap!

🪤 The fork trap in practice

Forks give you immediate superpowers: patch any internal, add new IPC, rewire the shell. But every VS Code monthly release brings integration work. You either lag behind upstream, users notice, or you staff an ongoing rebasing team, expensive. Meanwhile, you cannot rely on Microsoft’s marketplace or proprietary extensions to fill gaps. Microsoft has also removed or restricted direct VSIX downloads in the Marketplace over time, making offline or alternative distribution harder for non official editors.

We’ve written about this at length: forking looks fast now, but you pay it back with interest. The costs include maintenance, ecosystem access, legal licensing, and governance risk vis a vis a direct competitor with Copilot strategically integrated into VS Code.

🌍 Eclipse Theia: a platform for custom IDEs and AI tools

Eclipse Theia was built to let you create products, not just extensions. If your starting point is something very close to VS Code, you can get there: Eclipse Theia runs VS Code extensions, uses the same Monaco editor, and supports familiar UX patterns out of the box. But unlike a fork, you aren’t stuck inside someone else’s product boundaries. From that familiar baseline, you can go further, reshaping the UX, embedding AI deeply, and owning the governance.

Here is what that means in practice:

  • Design your own UX and shell Eclipse Theia’s open extension points, frontend and backend, let you compose and replace UI parts. You can embed AI assistants directly in non editor views, Terminal, Explorer, Debug, custom panels, or build proactive AI that observes lifecycle and UI events across the whole application, something extensions in VS Code can’t reliably do.
  • Fully customise your AI chat experience Unlike VS Code’s constrained chat API, Eclipse Theia lets you fully customise the chat view, add custom commands, integrate suggested questions, and design workflows tailored to your users’ needs. Whether you want a branded chat interface, domain specific interaction patterns, or seamless integration with the rest of your workbench, you have complete control.
  • Holistic context collection In Eclipse Theia, you can track multiple editors, recent edits, active tasks, terminal state, debug state, and domain specific artefacts in a single coherent context model. This enables AI that reacts to the full workbench, not just partial signals.
  • Own your AI strategy With Theia AI, you get a framework for LLMs, prompt management, tools agents, and context plumbing. You can integrate AI into commands, code actions, terminal flows, or custom widgets on your terms. You choose the models, cloud, on prem, or local, the data boundaries, and the UX.
  • Full stack extensibility and governance Eclipse Theia runs VS Code extensions and integrates with Open VSX for distribution, but you can also curate your own registry and policies. You define your update cadence, telemetry policy, and model endpoints, free from single vendor control. Open VSX Registry: https://open-vsx.org
  • Proof in production Arduino IDE 2.0 is one example of a deeply customised Eclipse Theia based product, not a VS Code fork, used by millions of developers worldwide. For a broader overview, see the active ecosystem of Eclipse Theia adopters: https://www.eclipse.org/topics/ide/articles/the-active-ecosystem-of-eclipse-theia-adopters/

In short: the feature classes that routinely force teams to fork VS Code, proactive AI, AI embedded everywhere, holistic context, and governance control, are first class capabilities in Eclipse Theia.

🏛️ Why it matters that this lives at the Eclipse Foundation

This is not just a technical choice. It is also about governance.

Eclipse Theia and Open VSX are hosted by the Eclipse Foundation, which means vendor neutral governance, transparent IP management, and community driven roadmaps. For adopters, that reduces the risk of policy shifts by a single commercial actor, especially when you are building a product that might compete with capabilities bundled into VS Code itself. The ecosystem benefits from shared maintenance, shared innovation, and a predictable governance model. Open VSX is an Eclipse open source project operated by the Eclipse Foundation: https://open-vsx.org

Practically, this lets companies invest in differentiation rather than continuously rebasing a fork, while still staying close to the VS Code user experience when that is valuable.

🔒 Governance matters, especially when your competitor runs the store

If your product competes with Copilot or with VS Code itself, you’re essentially forking a competitor’s flagship and hoping their policies won’t shift under you. We’ve argued before that open is not open enough when governance and distribution are controlled by a single vendor. The Eclipse community’s answer is open tech and open governance.

With Eclipse Theia, you’re not alone. You become part of an active ecosystem where multiple adopters share common maintenance costs and collectively benefit from platform innovations. Generic improvements, new IDE features, AI framework enhancements, security updates, are developed once and shared across the entire community. You invest in differentiation, not in reinventing the wheel or constantly rebasing a fork.

📚 Further reading

✨ One last thought

Cursor, Windsurf, and others have shown what AI can feel like in an editor. The next winners will show what AI can feel like in a seamless product. If that’s your goal, don’t start by forking your competitor’s product. Start on a platform designed for you.

Theia platform: start here https://theia-ide.org/theia-platform/

Thomas Froment


JakartaOne Livestream 2025

JakartaOne Livestream 2025

JakartaOne Livestream 2025 is a wrap! This was the seventh time we did the livestream, so we are getting used to it. This year we also had a professional production crew helping us out, and we also chose to switch platforms to stream on YouTube rather than what we have been using previous years.

The Livestream lasts for almost 12 hours, so it is a very long day. But also a lot of fun. Being together with the team in Ottawa these days in the beginning of December has become a nice pre-holiday tradition for us. Make sure to check out the recording of the show if you missed some of the talks, or weren’t able to follow it live.

Ivar Grimstad